DIY Tutorial to Make Home Made Apple Vinegar
In this DIY tutorial, you will learn all necessary steps to make home made apple vinegar. From choosing apples to preparing yeast, this niok.net original diy tutorial containst all the information.
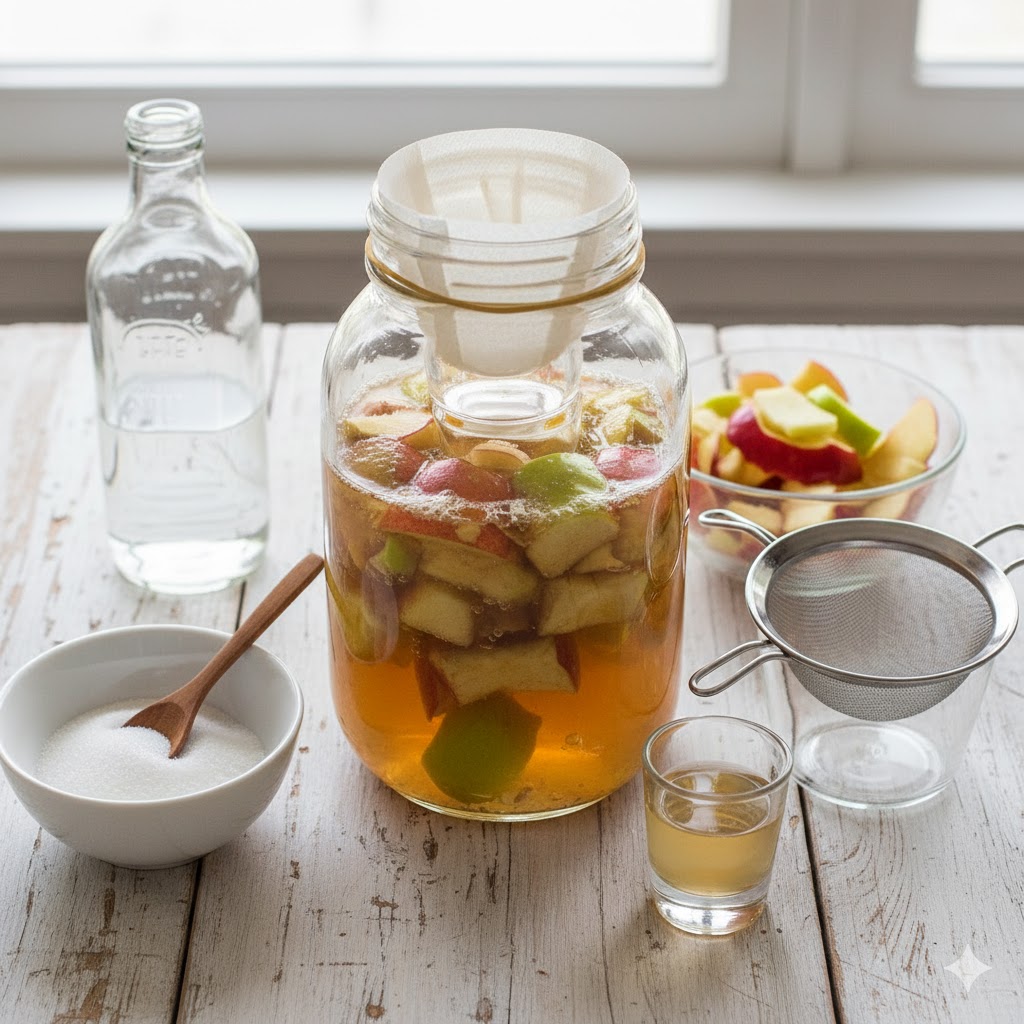
Equipment You’ll Need
- Glass Jar: A wide-mouth quart-sized or half-gallon glass jar (like a large Mason jar). Avoid metal containers for fermentation.
- Cover: A coffee filter, paper towel, or a piece of tight-weave cloth (like butter muslin, not loose cheesecloth, which fruit flies can penetrate).
- Securing Band: A rubber band or a canning jar lid ring to secure the cover.
- Spoon/Stirrer: A non-metal spoon (wooden or plastic) for stirring.
- Strainer: A fine-mesh sieve or colander for straining.
- Optional: A small, clean glass weight (like a shot glass or specialized fermenting weight) to keep the apple scraps submerged.
Ingredients
- Apple Scraps: Cores and peels from about 6-8 medium organic apples. (You can save and freeze scraps until you have enough). Ensure they are fresh and not moldy or rotten.
- Sugar: 2 – 4 tablespoons of granulated sugar (this feeds the yeast, it is mostly consumed during fermentation).
- Water: Enough non-chlorinated, filtered, or boiled/cooled water to cover the scraps (about 2-3 cups for a quart jar). Chlorine can inhibit the bacteria needed for fermentation.
- Optional Starter: 1/4 cup of raw, unpasteurized ACV with the “Mother” to speed up the process.
Step-by-Step Instructions
Phase 1: Alcohol Fermentation (2-3 Weeks)
- Prepare & Mix: Place your apple scraps in the clean glass jar, filling it about 3/4 full.
- Add Sugar Water: In a separate bowl, mix the sugar with your non-chlorinated water until dissolved. Pour this mixture over the apple scraps in the jar until they are fully submerged. Leave about an inch or two of headspace at the top.
- Pro Tip: If the scraps float, use a small, clean glass weight to keep them completely under the water. Any scraps exposed to the air can grow mold.
- Cover: Cover the mouth of the jar with your coffee filter, paper towel, or cloth, and secure it tightly with a rubber band or the lid ring. Do not use a tight, air-sealed lid. The mixture needs to breathe.
- Ferment: Place the jar in a warm, dark place (like a pantry or cupboard) out of direct sunlight.
- Stir Daily: Stir the mixture once a day for the first week or two to re-submerge the scraps and prevent mold growth on the surface. You should start to see bubbles and foam—this is a sign that the yeast is converting the sugar into alcohol (apple cider).
- Check the Scent: After 2-3 weeks, the vigorous bubbling will slow down, and the mixture should start to smell alcoholic, like hard cider.
Phase 2: Acetic Acid Fermentation (3-6 Weeks)
- Strain: Once the first stage is complete, strain the liquid through a fine-mesh sieve or cheesecloth into a clean bowl or back into the same jar. Discard the apple solids (compost them!).
- Continue Fermenting: Re-cover the liquid with the breathable cover (coffee filter/cloth) and return it to the warm, dark spot.
- Wait for Vinegar: Over the next 3-6 weeks, acetic acid bacteria will convert the alcohol into acetic acid (vinegar). A gelatinous, cloudy film called the “Mother of Vinegar” (similar to a kombucha SCOBY) may start to form on the surface—this is a good sign! It’s harmless and helps the process.
- Taste Test: Start tasting the liquid weekly after about 3-4 weeks. When it has a strong, tangy, and acidic taste (like store-bought ACV) and the sweetness is gone, your vinegar is ready.
- Bottle and Store: Once it’s to your liking, strain the vinegar one last time (if you want to remove the Mother, or you can leave it in). Pour the finished ACV into airtight, sterilized bottles. It can be stored at room temperature, although some prefer to refrigerate it to slow any further fermentation.